Apple Mail (OS X Tiger 10.4) email setup tutorial
Before you can configure email software to send and receive emails from our servers, you must
- Purchase a cPanel or Cloud hosting subscription service.
- Create an email account on our cPanel or Cloud hosting servers.
Once you have done this, you can configure your email software to connect to the email account you created on our servers.
Note: The default Apple Mail (or Mac Mail) application has several known issues, including not saving settings during setup, losing settings randomly and having issues with connecting several devices to the same email account. Unfortunately these are intermittent issues with the software itself, if you encounter these we recommend switching to Thunderbird or Outlook for Mac.
Setup email account using Apple Mail OS X Tiger 10.4
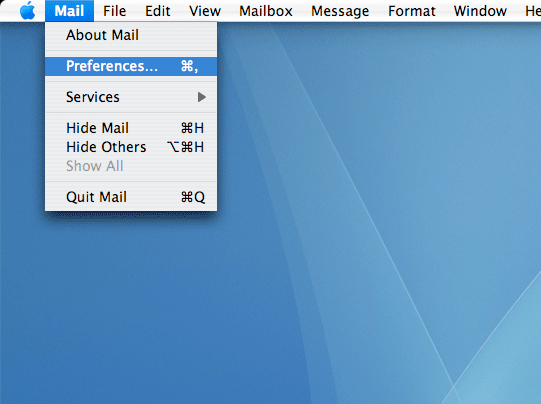
- Click Mail from the menu bar
- Select Preferences
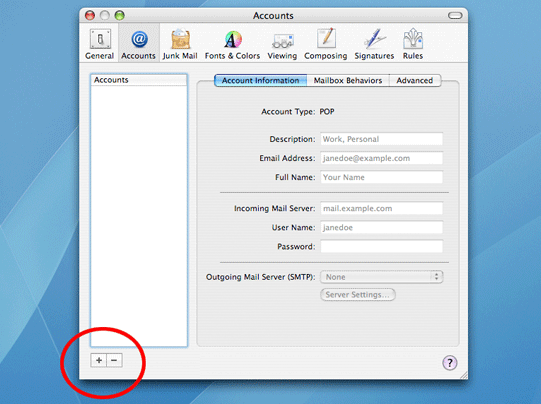
3. Click the Plus [+] icon located at the bottom left corner of the Accounts window
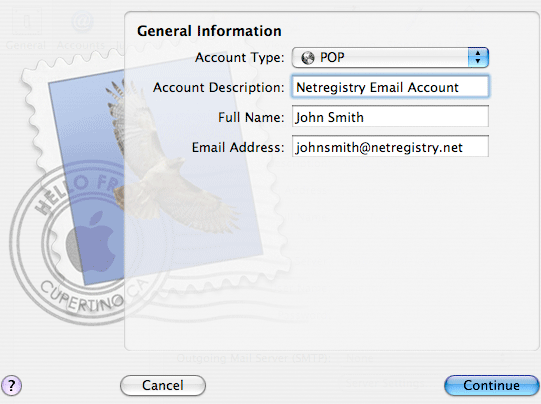
4. Complete the following information: Account Type: Select POP from the drop down menu
Account Description: May be any descriptive text
Full Name: The name displayed to the email recipient
Email Address: The account email address
5. Click [Continue]
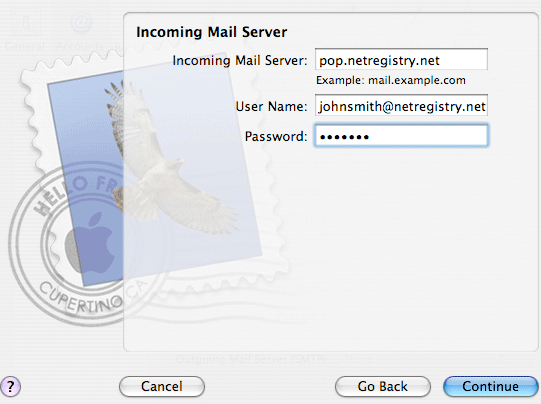
6. Complete the following information:
Incoming mail server: pop.netregistry.net
User Name: The email account address
Password: The password used for this email account
7. Click [Continue]
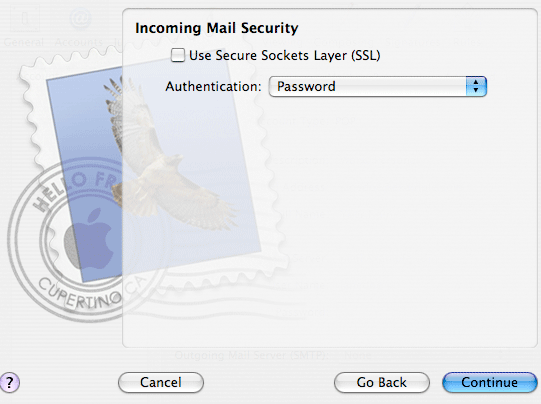
8. Select Password from the Authentication dropdown menu. Use Secure Sockets Layer (SSL) should not be selected
9. Click [Continue].
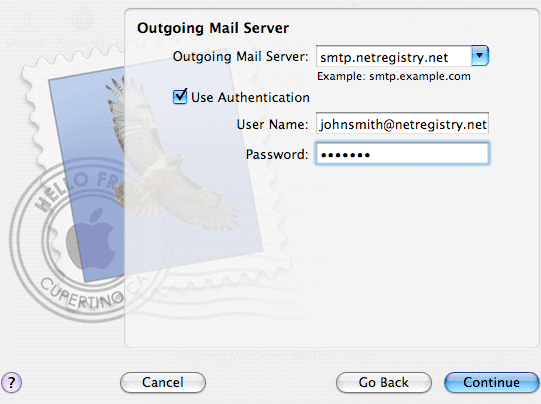
10. Complete the following information:
Outgoing mail server: smtp.netregistry.net
Use Authentication: Selected. User Name: The email account address
Password: The password used for this email account
11. Click [Continue]
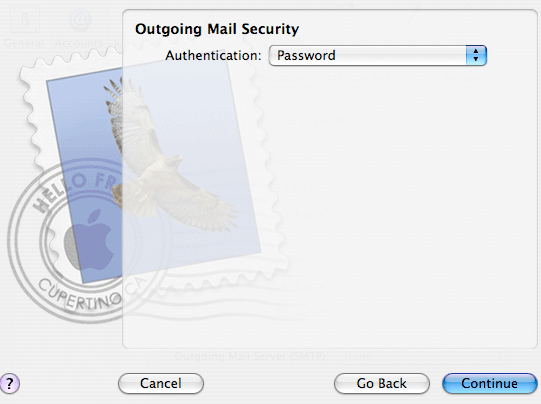
12. Select Password from the Authentication dropdown menu
13. Click Continue
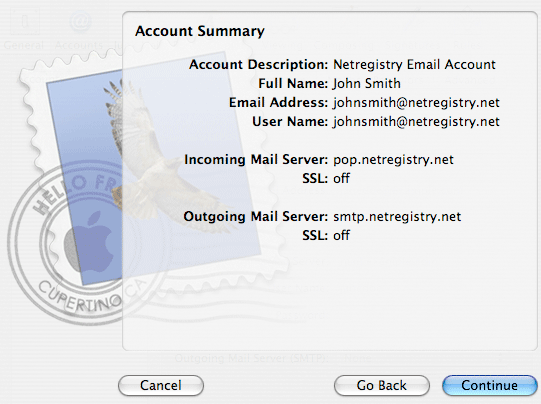
14. Review the Account Summary provided and click [Continue].
Note: If SSL is On, the following steps detail how this is turned off
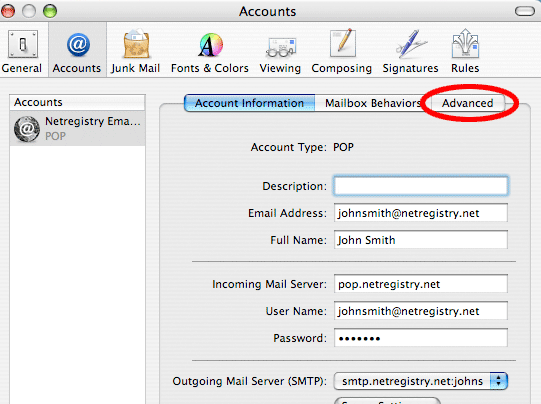
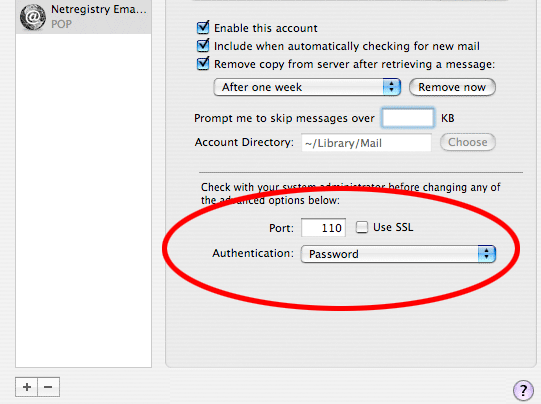
15. Select the Advanced tab
16. Ensure the Port number is 110, and Use SSL is not selected. Select Password from the Authentication dropdown menu if not previously selected
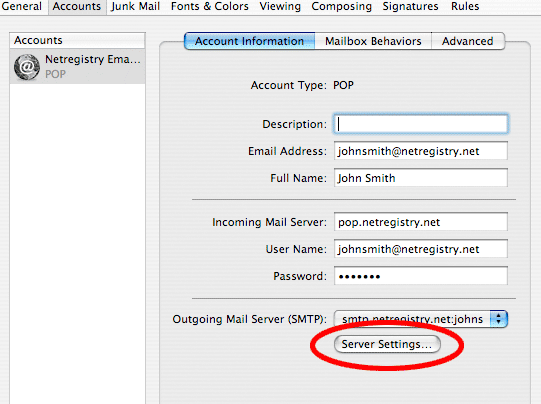
17. Select the Accounts Information tab and click [Server Settings]
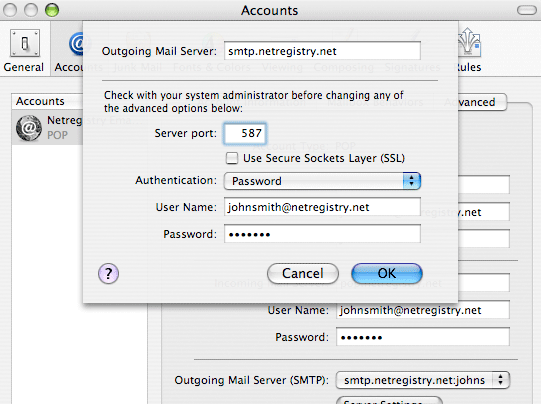
18. Change the Server Port from 25 to 587. Ensure Use Secure Sockets Layer (SSL) is not selected. Click [OK]
19. This completes the setup of your email account.
If you experience any issues setting up your Apple Mail, click here for troubleshooting help.
Updated 2 months ago