How to set up or turn off Microsoft Security Defaults
When you log in to your Microsoft email account for the first time you will be asked to set up the Microsoft Security Defaults. This is a security measure that helps prevent people from logging in to your account, by requiring approval from a connected mobile phone.
In this article we will show you how to:
How to set up Microsoft Security Defaults
- Log in to your Microsoft email account
You can either log in through your Webcentral account or by going to outlook.com
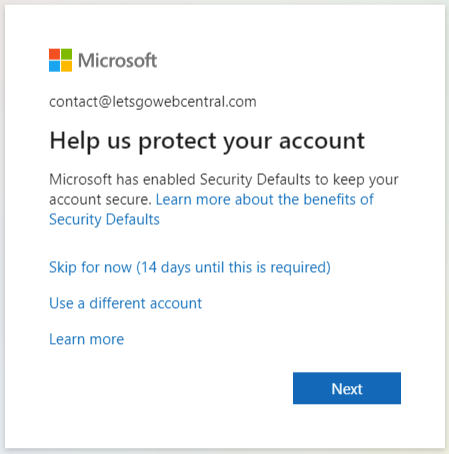
- After you enter your email and password, you will be asked to set up Microsoft Security Defaults, click Next
- Install the Microsoft Authenticator app
 on your mobile device
 - Click Next
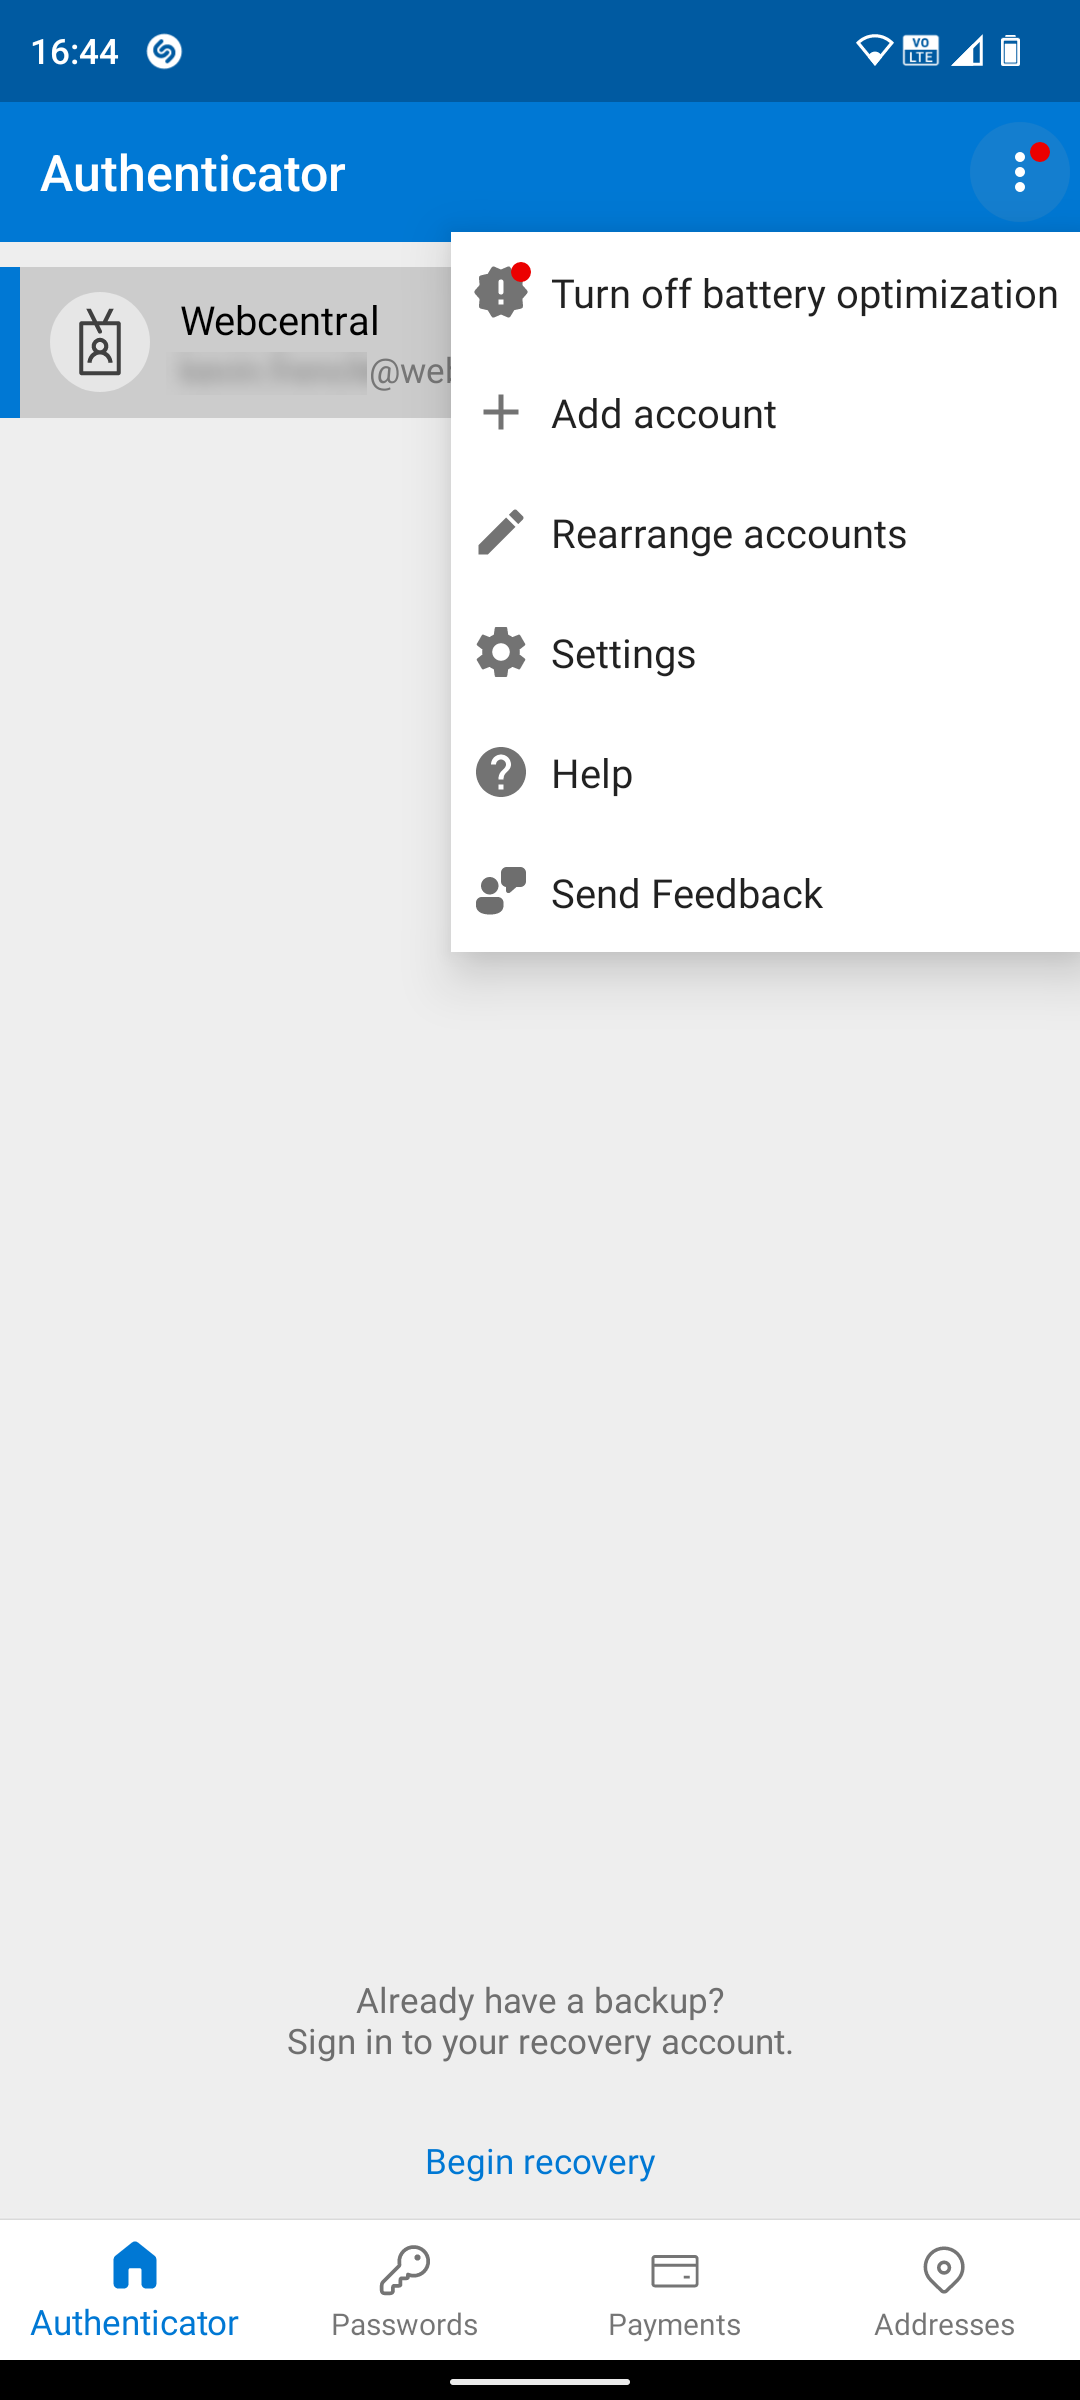
- Open the Authenticator app
- Click the three verticle dots in the top right corner of the screen and click + Add account
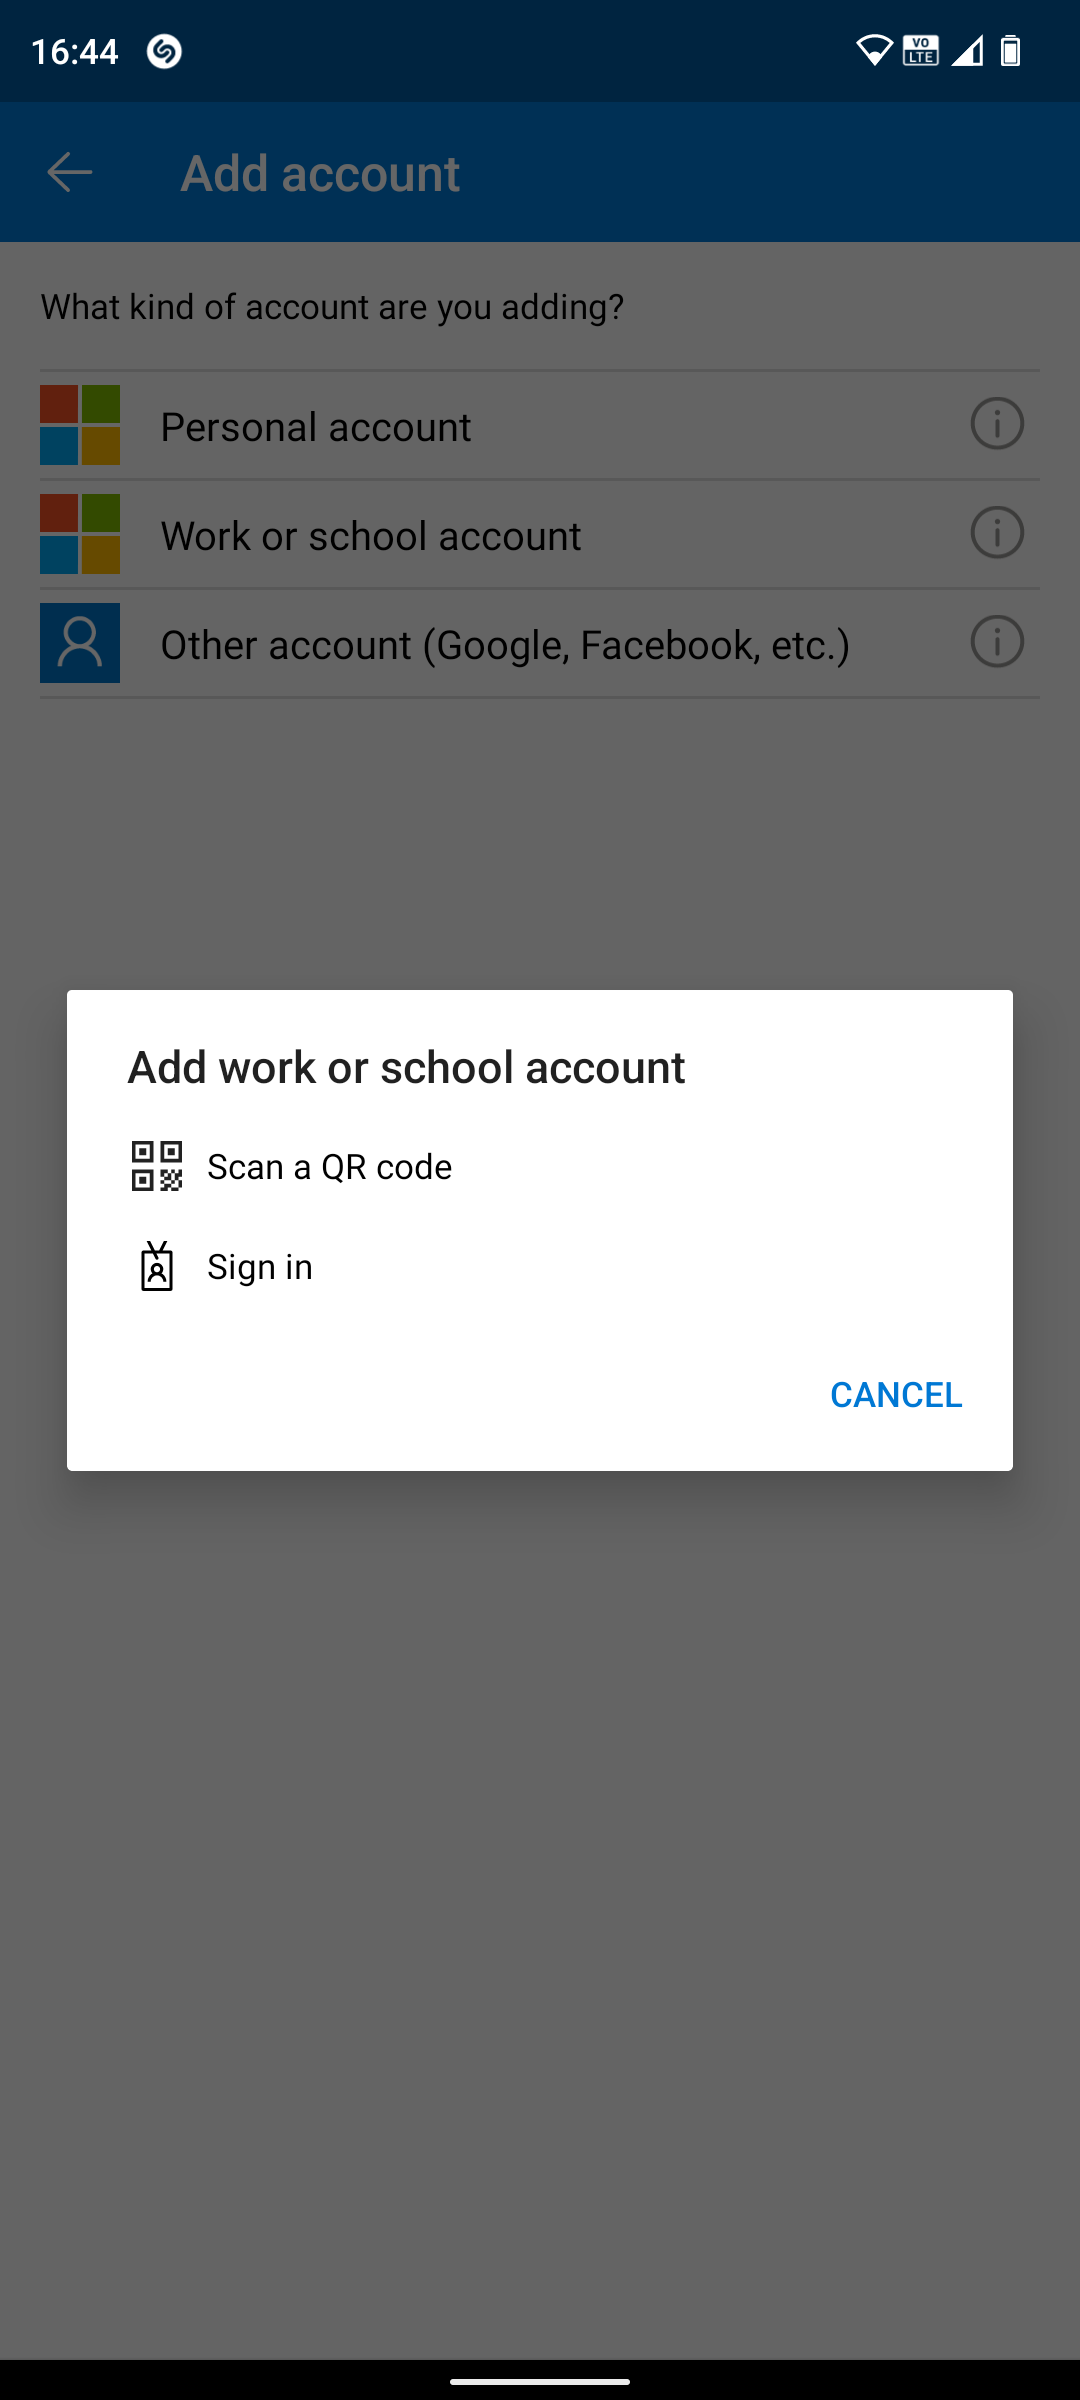
- Click Work or school account
- On your computer, click Next to show the QR code
- On your phone, click Scan QR code or Sign in
- If you clicked Scan QR code, point your phone's camera to the QR code on your computer screen. This will add the account to your Microsoft Authenticator app
If you click Sign in, sign in to your account using your email address and password and follow the instructions
- On your computer, click Next
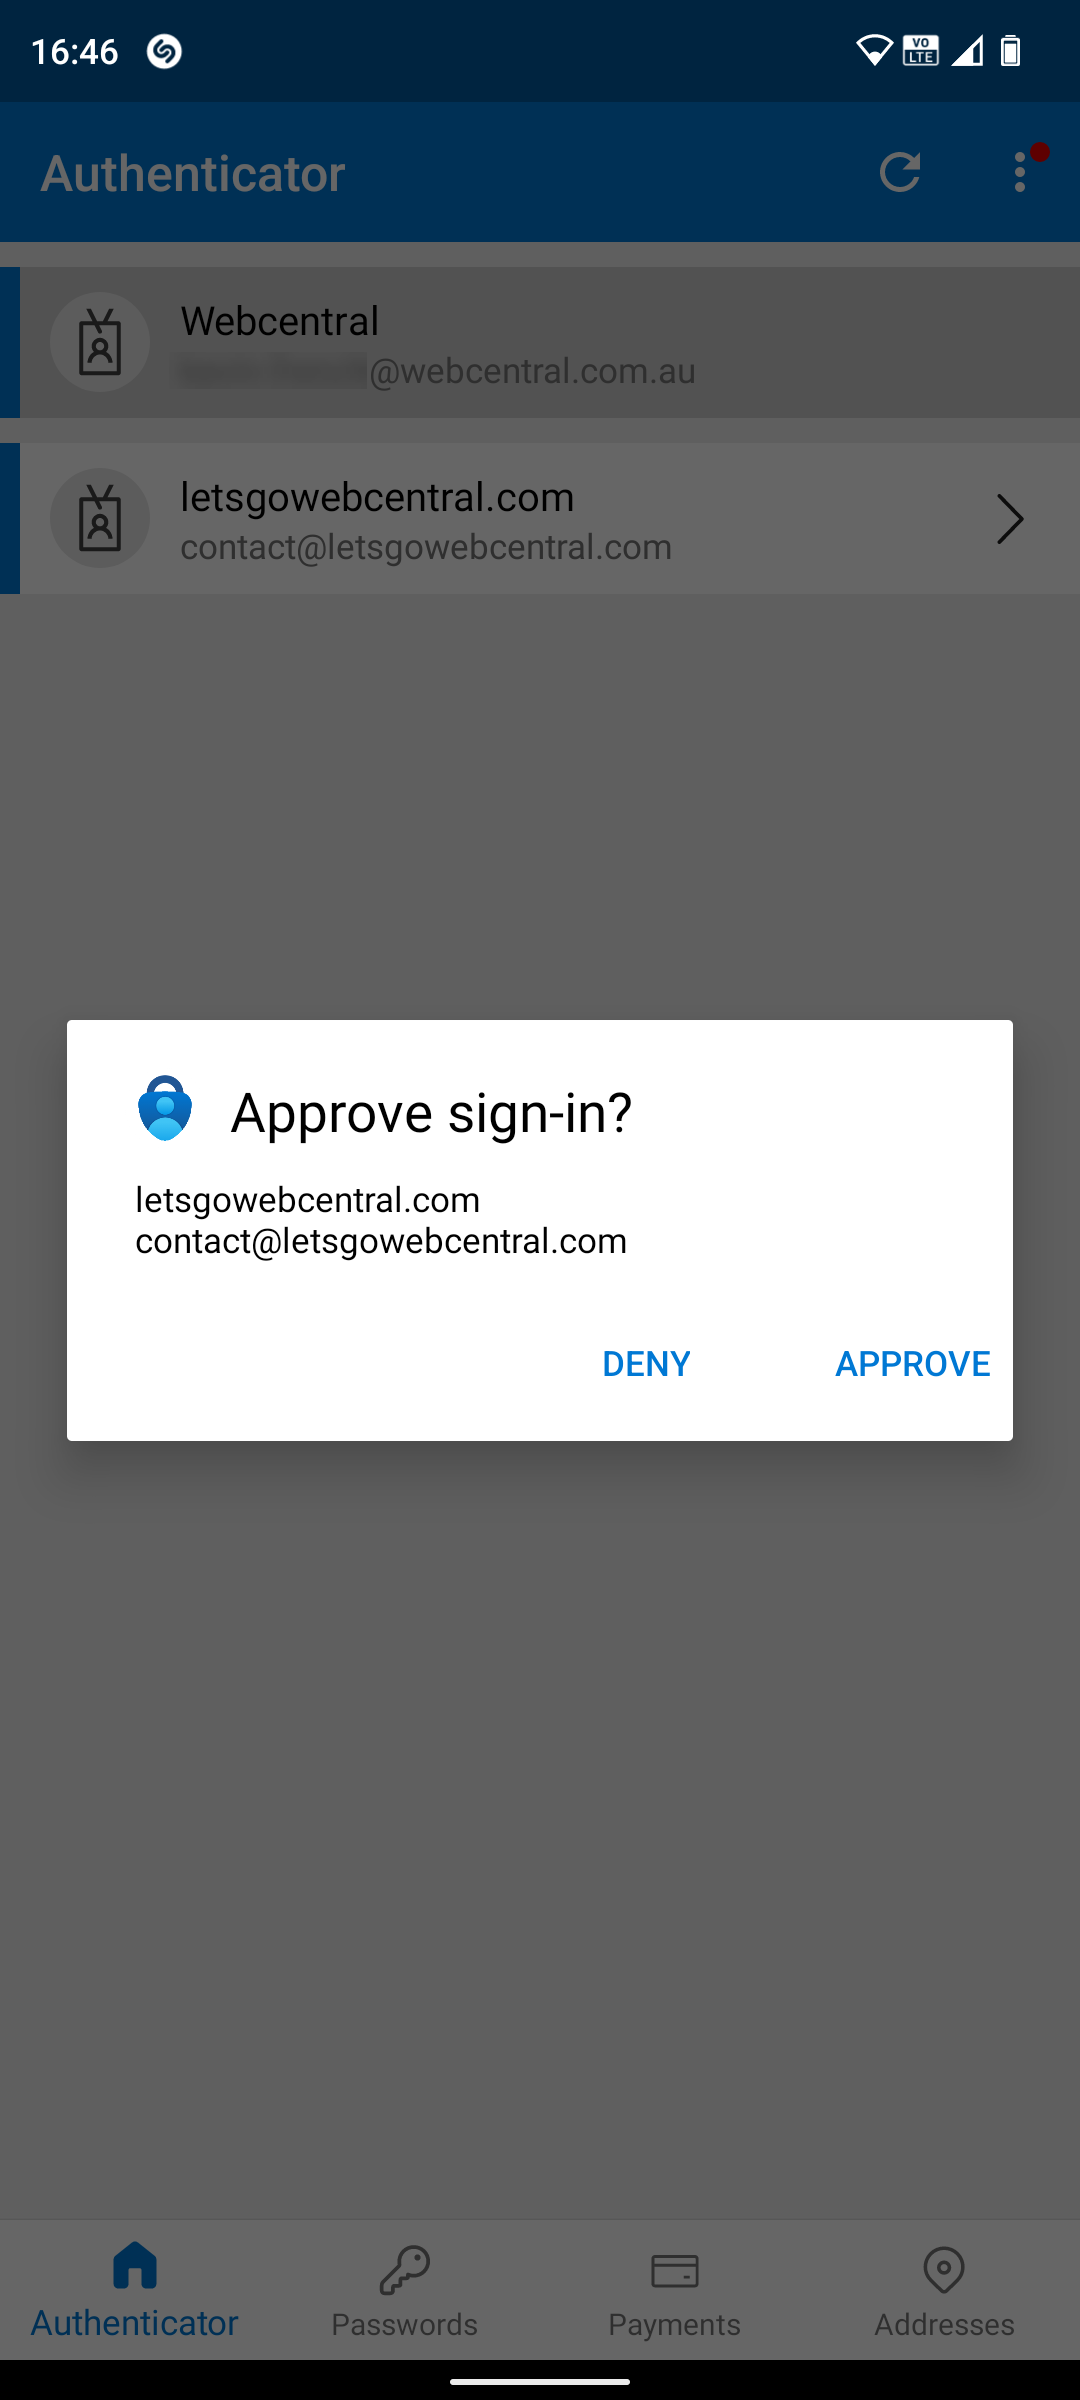
- You will receive a notification on your phone to approve the sign-in, click APPROVE
- Click Next
- You now need to connect your phone number. From the drop-down menu select your country and enter your phone number
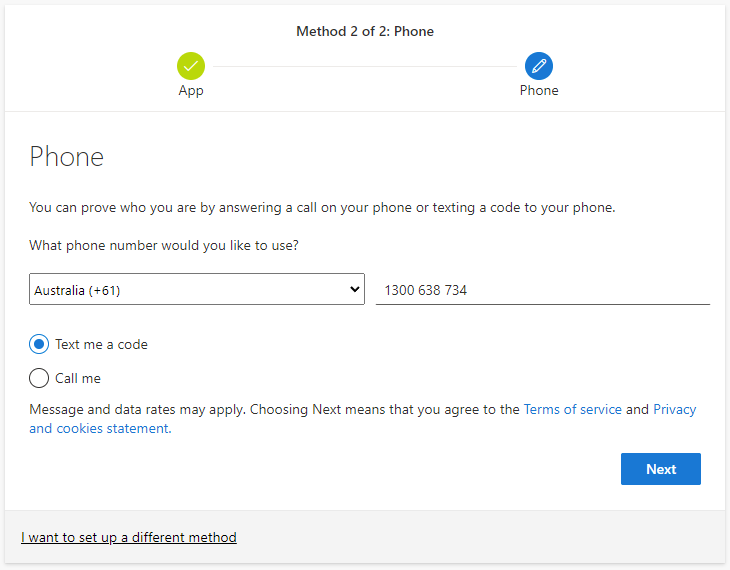
- Select either Text me a code or Call me and click Next
- If you selected Text me a code you will be sent an SMS verification code, type the code into where it says Enter code
If you selected Call me, you will receive a phone call and will be asked to press the pound key (#). Press the pound key (#) to complete the verification.
- Click Next
- You have now successfully set up your security info, click Done
Now the next time you log in to your Microsoft email account, you will need to approve the sign-in from your phone.
How to disable Microsoft Security Defaults
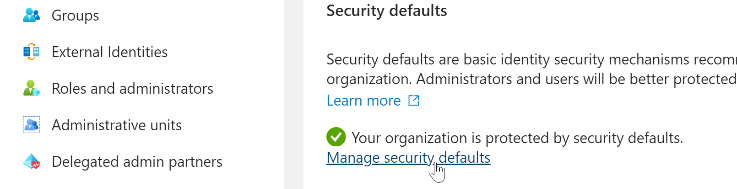
You can disable the Security Defaults in Microsoft Azure. Please note, that it is not recommended to disable this feature as it offers additional protection against unauthorised people accessing your account.
- Log in to your Microsoft account with Global Admin permissions, please click here to see how to enable Global Admin permissions
- After logging in click here to go to Microsoft Azure Properties
- Click Maybe Later, if asked to take a tour
- Scroll down and click Manage security defaults
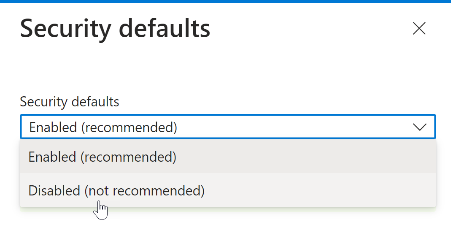
- Click the drop-down menu and select Disabled (not recommended)
- Select a reason for disabling this feature and click Save
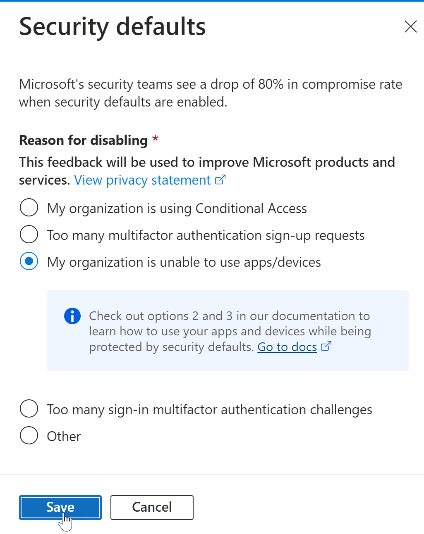
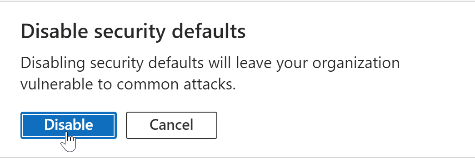
- Click Disable
You have now disabled Microsoft Security defaults. The next time you log in to your Microsoft email account you will not be asked to set up Security defaults and any accounts where it has been set up will no longer require you to approve the sign-in from your mobile device.
Updated 23 days ago