
Managing backups in the Hosting Panel
Learn how to manage your backups and restores from one convenient interface in the Webcentral Hosting Panel.
Some newer hosting accounts use an administration interface directly within the Webcentral Hosting Panel. Unlike cPanel, there is no separate login — you just log in to your Webcentral account at https://theconsole.webcentral.au and control your web site, email, and WordPress from one unified interface.
This article provides an overview on how to use this administration interface to manage your backups and restores. It applies to the following account types:
- Mini Web Hosting
- Starter Web Hosting
- Plus Web Hosting
- Pro Web Hosting
- Max Web Hosting
- Hosting for WordPress
To manage your backups and restore them if necessary, follow these steps:
-
Log in to your account as described in Managing your website in the Hosting Panel.
-
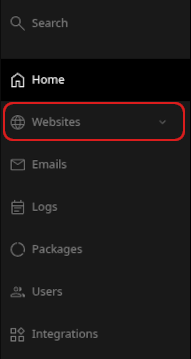
When the control panel appears, in the left sidebar, click Websites:
-
On the Manage websites page, click the website you want to manage.
-
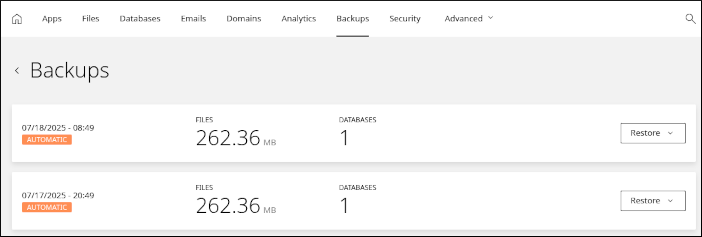
A list of tabs appears at the top of the page. Click the Backups tab:

-
The Backups page appears with a list of automatic backups generated for your account:
-
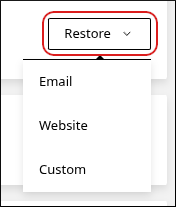
To restore a backup, click Restore and then select an option:
-
Email: This option restores email messages for any email accounts you have.
ImportantBe careful restoring emails. Any email messages newer than the date of the backup may be lost.
-
Website: This option restores the website files for your account.
-
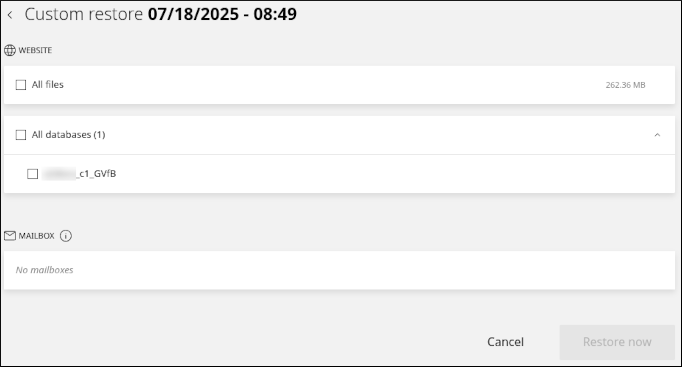
Custom: This option enables you to select a custom combination of items to restore. You can restore email, website files, and databases:
-