How to check your domains Name Servers
The easiest way to do this is by doing a WHOIS lookup, just scroll down to the information under WHOIS and look for the Name Servers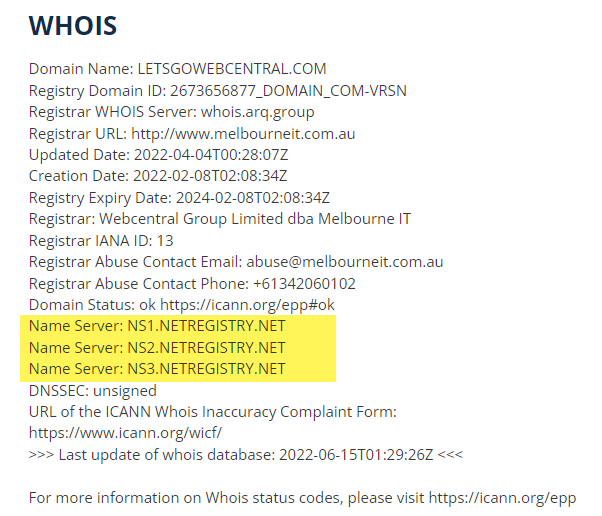 If your Name Servers are pointing to one of our services, then you can add in the records via your Webcentral portal or hosting. However, if your Name Servers are pointing elsewhere such as another DNS provider, you will need to manually connect your domain with Microsoft by adding the necessary zone records with them.
How to manually connect your domain with Microsoft
To connect your domain with Microsoft you will need to add several zone records, which are found in your Microsoft admin center, to your domain’s DNS records.- Log in to your Webcentral account
- Next to your domain, click Manage
- Click Microsoft 365 (or Microsoft 365 Email)
- In the Manage Microsoft 365 menu, under Create a User Account, you will see the message Can not create account, domain is not available yet. Please try again later.
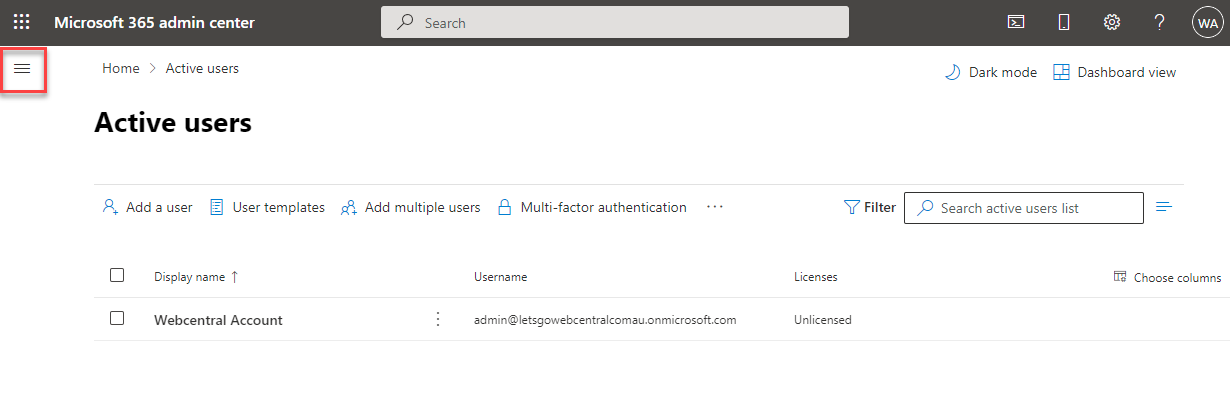
- You will need to log in to your default admin email account. But first, you need to create a password for it. Under User Accounts, click the admin email (it will be admin@yourdomainname.onmicrosoft.com)
- Under Reset Password, create a password and then click Reset
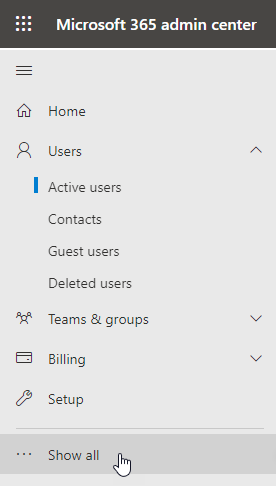
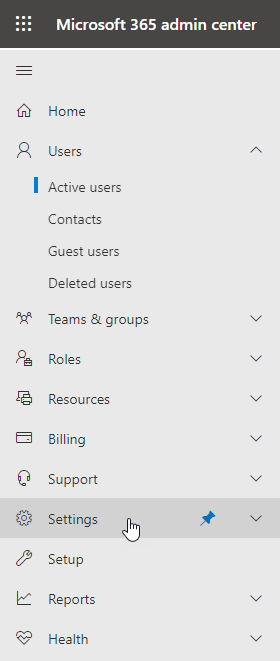
- In the Microsoft 365 admin center, click the three horizontal lines in the top left of the screen to show the menus
- Click Show all
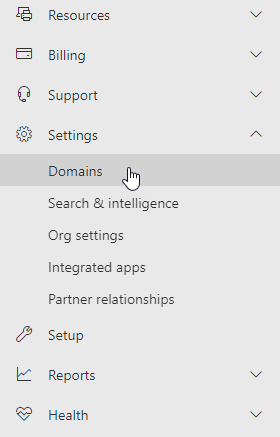
- Click Settings to reveal more options
- Click Domains
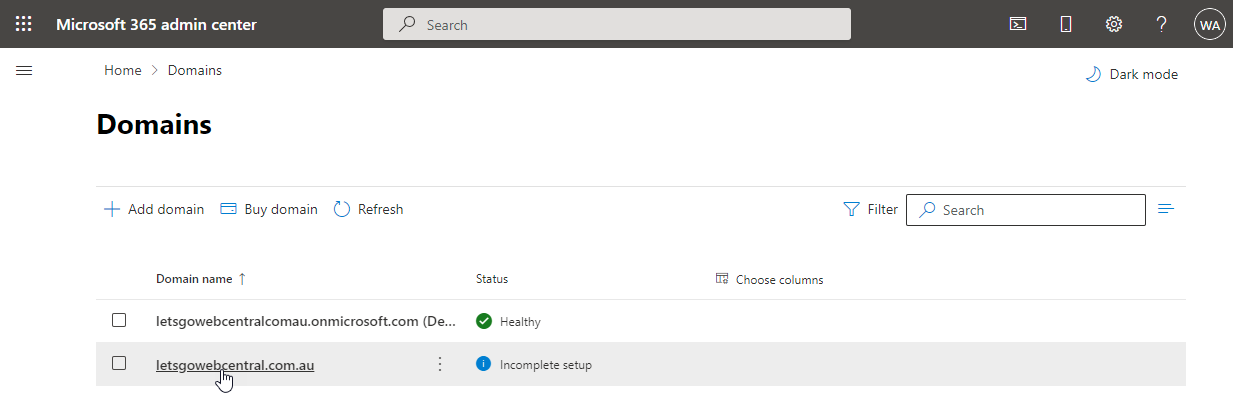
- Click on your domain - it will show as Incomplete setup, under Status
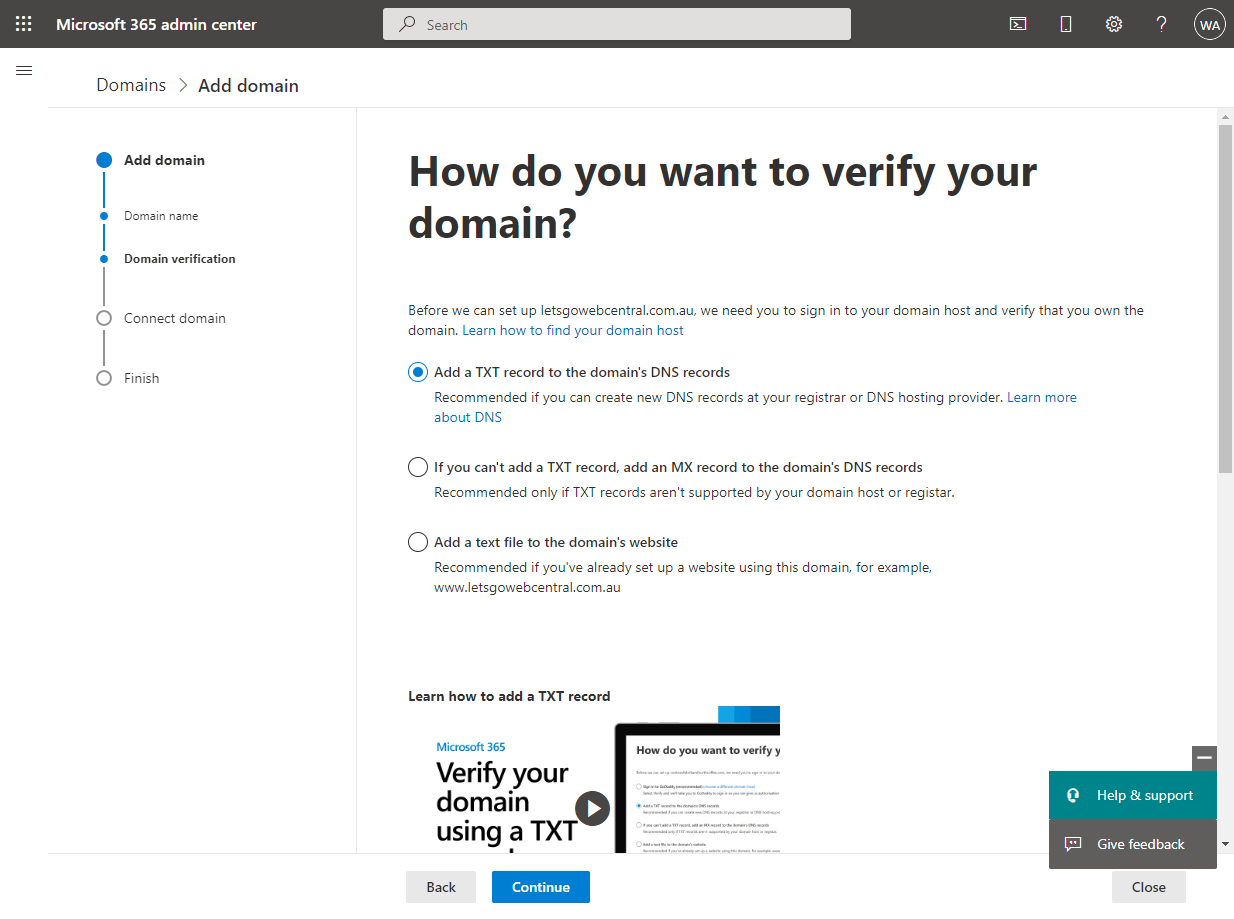
- Click Start setup

- Under How do you want to verify your domain? Click Add a txt record to the domain’s DNS records and click Continue
- Add the TXT record to your domain’s DNS records, this is where your Name Servers are pointing. If you are using cPanel, click here to see a support article on how to add zone records. If you are using another provider, you may want to contact them for help or refer to Microsoft’s video and support articles
- Go back to the Microsoft admin center and click Verify

- Click Continue
- It will now show you three more records you need to add to your DNS host. Click the arrow next to the record to show it

- Add the MX, CNAME, and TXT record to the same place you added the first TXT record. Again, please click here if you are using cPanel to see how to add zone records
- Go back to the Microsoft admin center and click Continue
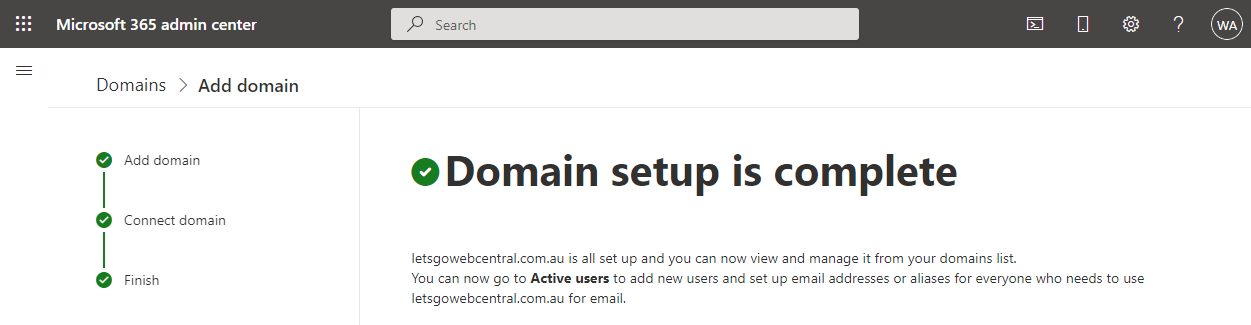
- If successful it will say Domain setup is complete
- Click Done
- You can now go back and create your Microsoft email account.