> ## Documentation Index
> Fetch the complete documentation index at: https://support.webcentral.au/llms.txt
> Use this file to discover all available pages before exploring further.
# Managing Titan Mail accounts
> Learn how to manage your Titan Mail accounts using the Webcentral Customer Panel. This article describes how to create and manage email accounts, set up a catch-all address, forwarders, and more.
This article describes how to manage your Titan Mail accounts using the Hosting Panel. From the Hosting Panel, you can do the following:
* Create and manage email accounts.
* Set up forwarders.
* Set up a catch-all address.
* Import email data from another server.
* Check the DNS status of your domain.
* Get the mobile app for Android and iOS devices.
* Set up DKIM (DomainKeys Identified Mail) for your domain.
* Get configuration information for third-party email client applications.
## Accessing the management interface
To access the management interface for Titan Mail accounts, you use the Hosting Panel. To do this, follow these steps:
1. Log in to the Hosting Panel at [https://theconsole.webcentral.au/](https://theconsole.webcentral.au/).
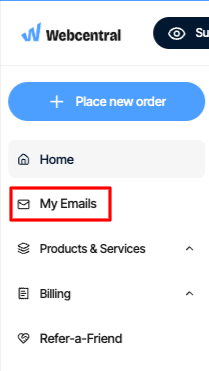
2. In the left sidebar, under **My Emails**
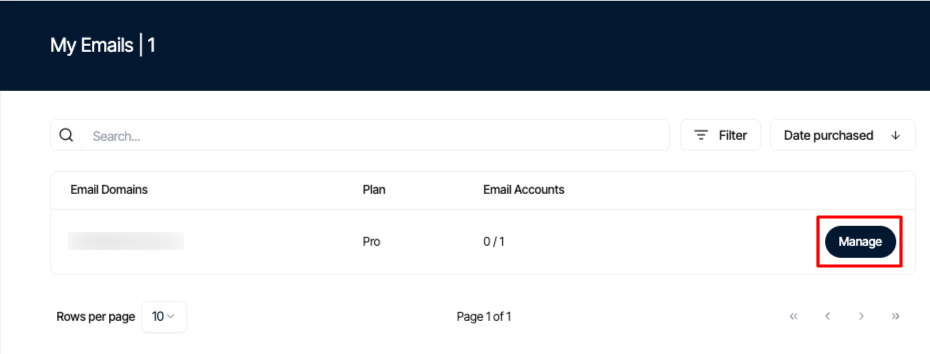
3. On the **My Emails** page, locate your email account, and then click **Manage**:
The following sections describe these options in detail.
## Creating an email account
To create an email account, follow these steps:
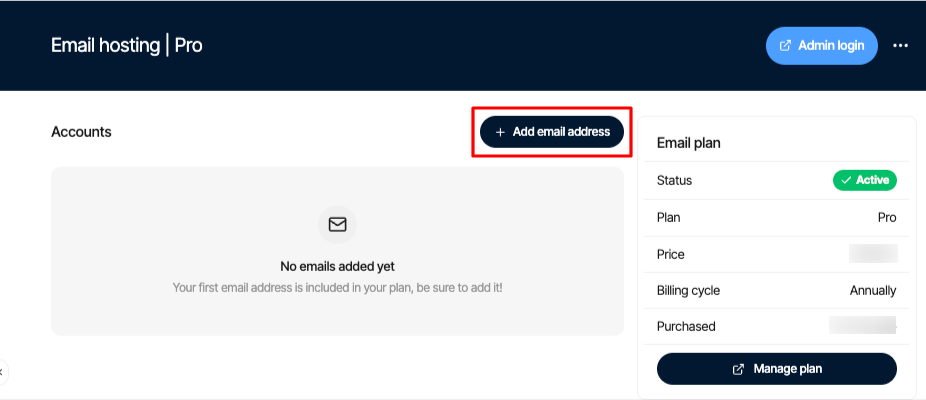
1. Click the **Add email address** icon:
2. In the **Email address** text box, type the username for the email account:
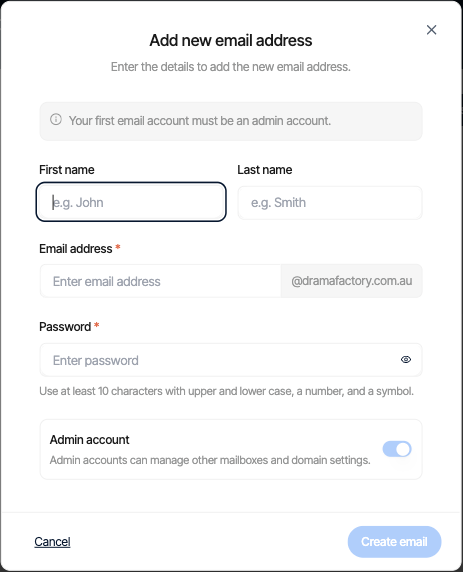
To make the account an administrator account, select the **Make this email account an admin** check box.
3. In the **Password** section, type the password.
4. In the **Password recovery email address** text box, type an email address to be used if the user needs to reset his or her password. (If applicable)
5. Click **Create email**, and then click **Done**. The new account is ready to use.
## Managing an existing email account
To manage an existing email account, follow these steps:
1. Locate the account you want to manage, and then click the three-dot icon:
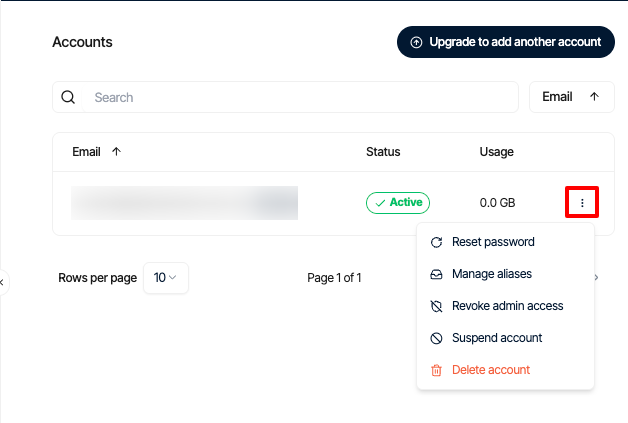
2. Several options appear:
* **Reset Password**: Select this option to reset the password for the account.
* **Manage Alias**: Select this option to add an alias. Aliases enable you to use multiple e-mail addresses with one account. For example, if the primary email account is [info@example.com](mailto:info@example.com), you could add an alias [information@example.com](mailto:information@example.com), and the [info@example.com](mailto:info@example.com) account would receive any messages sent to [information@example.com](mailto:information@example.com).
* **Suspend Account**: Select this option to suspend the account.
To unsuspend an account, in the account list, in the **Status** column, hover over **Suspended**, and then click **Unsuspend**.
* **Delete Account**: Select this option to delete the account.
## Setting up forwarders
You can set up a forwarder to forward messages from one account to another. To do this, follow these steps:
1. Click the **Admin Login** icon:
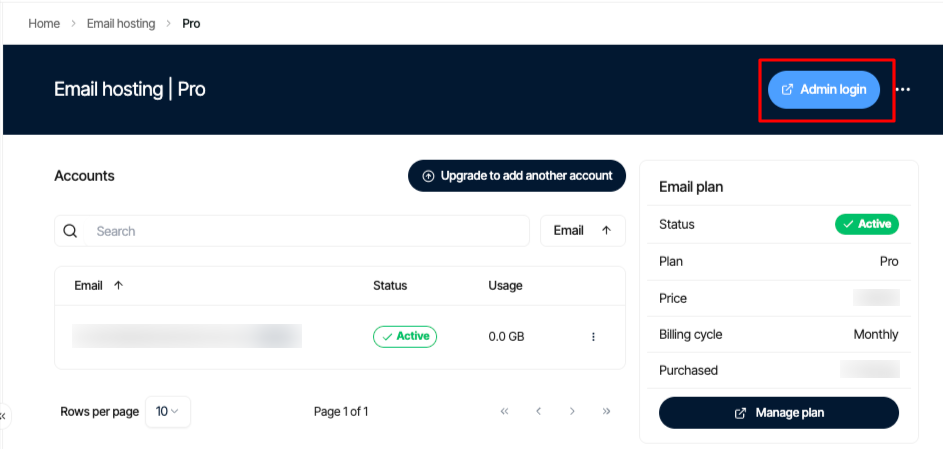
2. Click **Forwarding account**.

3. In the **Create an internal forwarding account** text box, type the username of the account from which you want to forward messages:
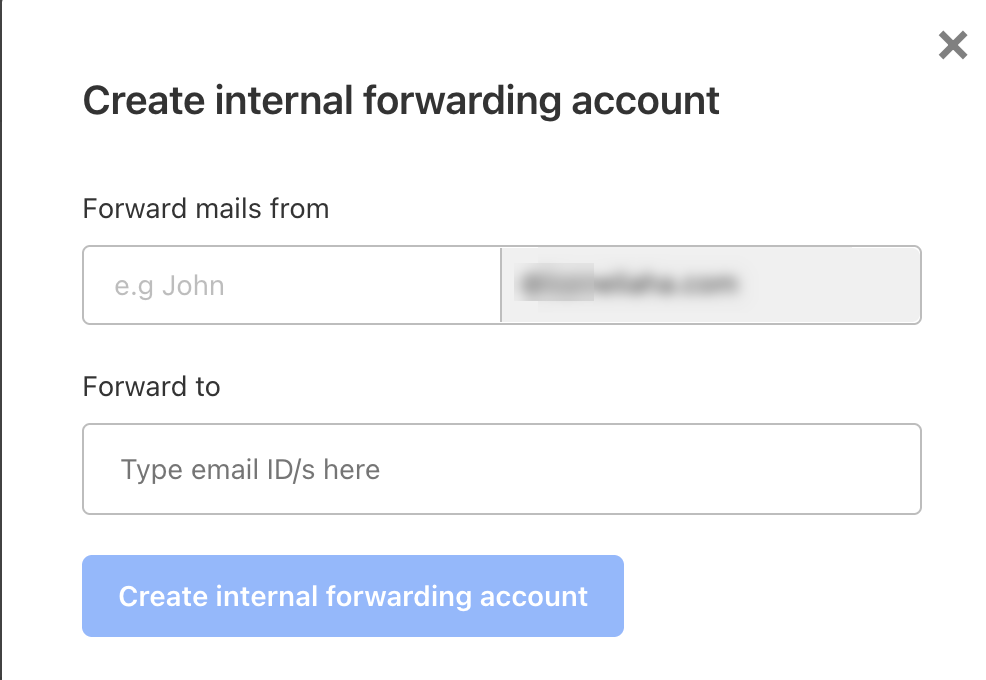
4. In the **Forward to** list box, type the destination email address for the forwarded messages.
You can forward messages to multiple email addresses if you want.
5. Click **Create internal forwarding account**.
## Setting up a catch-all address
You can set up a catch-all address for your domain. A catch-all address "catches" e-mail messages that are sent to non-existent or invalid e-mail addresses on your domain. For example, normally if a customer sends a message to [sals@example.com](mailto:sals@example.com) instead of [sales@example.com](mailto:sales@example.com), the message is rejected (assuming, of course, that a [sals@example.com](mailto:sals@example.com) address does not actually exist). With a catch-all address however, this message is delivered to the e-mail account that is designated as the catch-all address.
When you enable a catch-all address, you can receive a large volume of unwanted e-mail messages, including spam. Additionally, these messages take up disk space, so you should regularly monitor a catch-all address to ensure it is not filling your storage quota.
To configure a catch-all address for your domain, follow these steps:
1. Click the **Catch-all Email** icon:
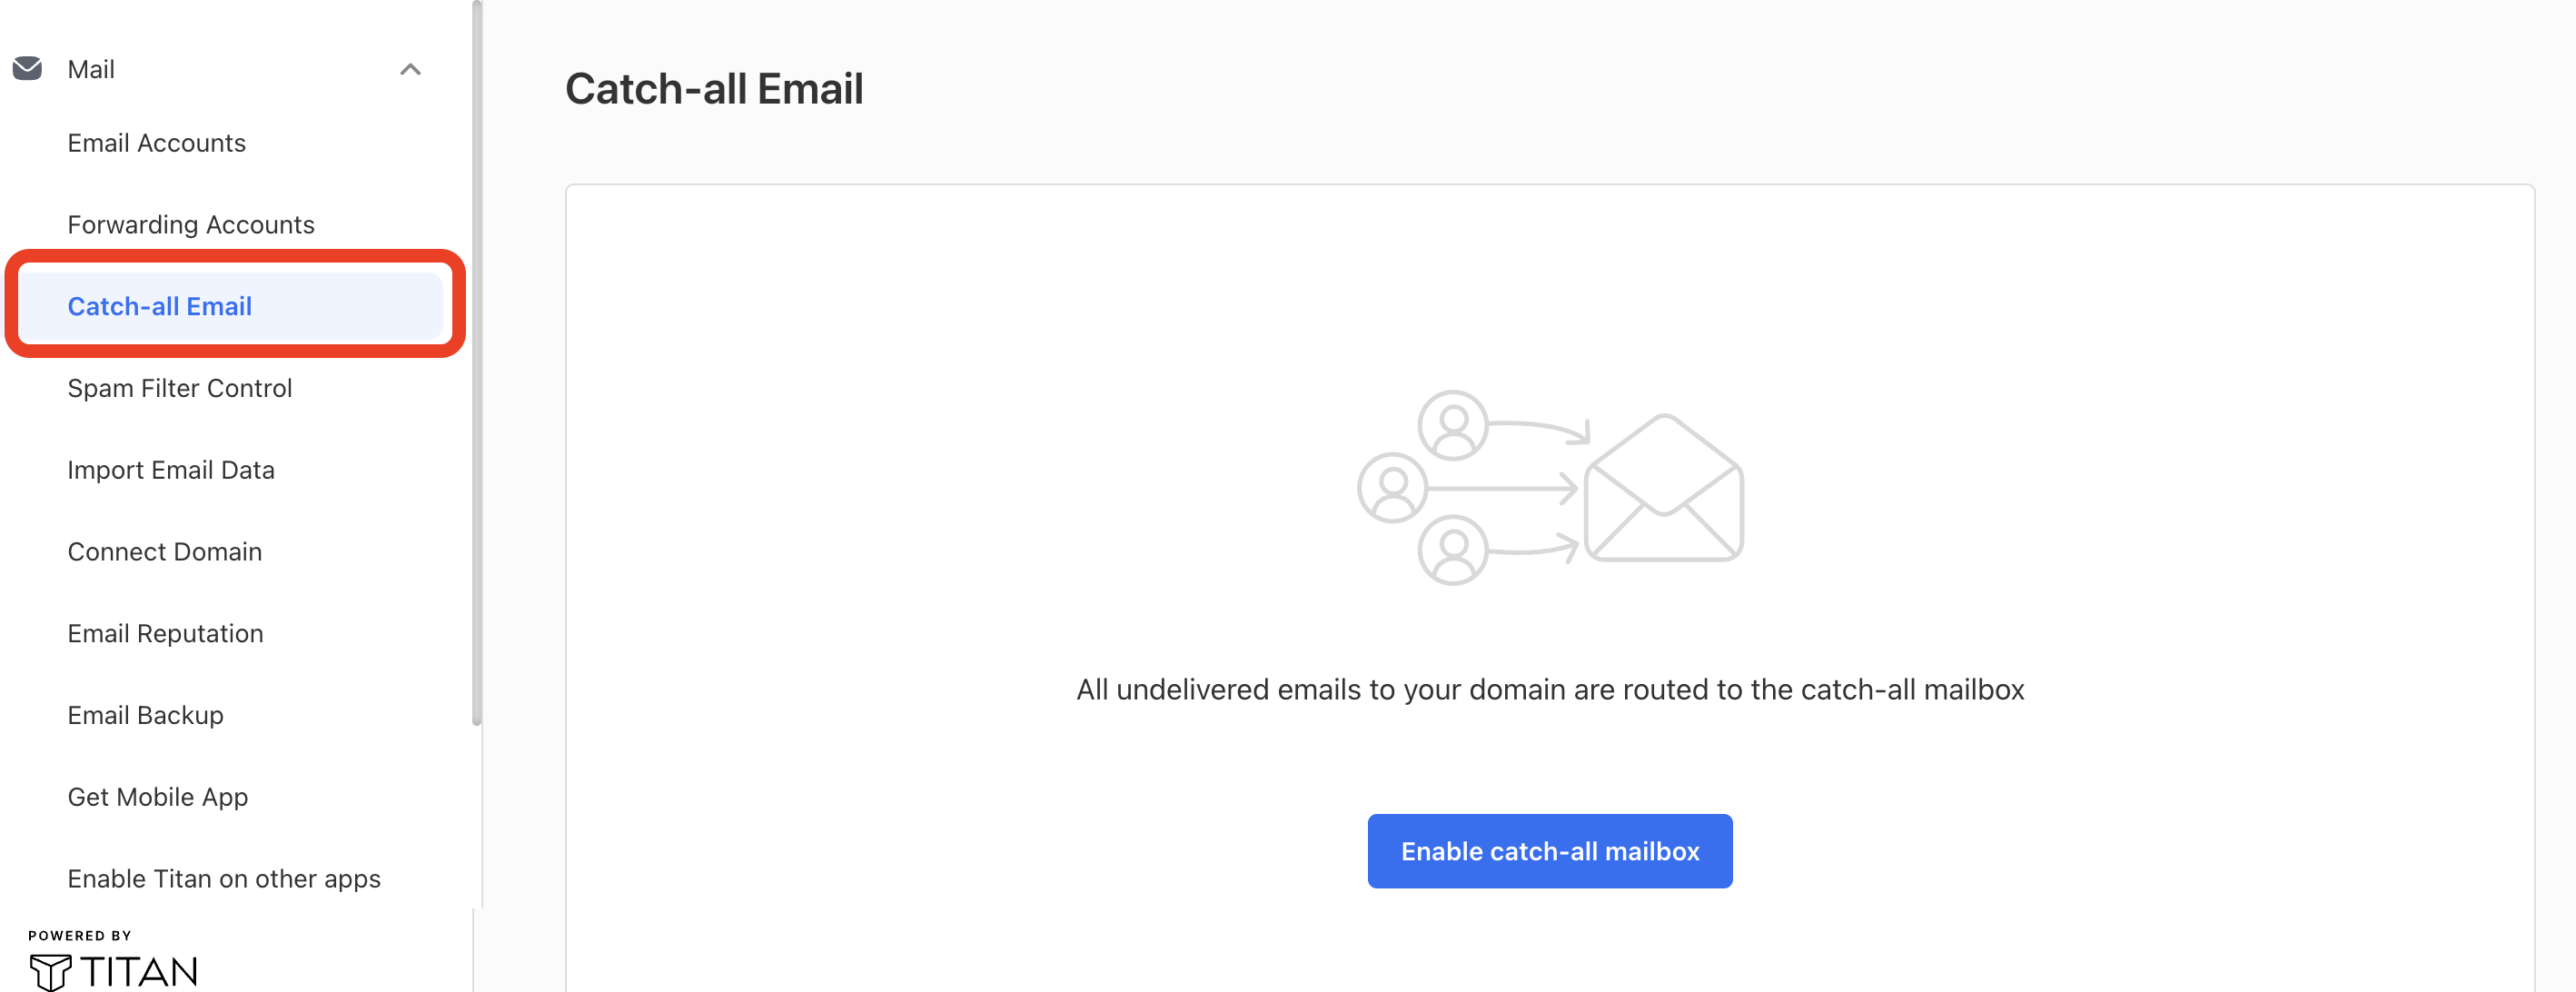
2. Click **Enable catch-all mailbox**.
3. In the **Enter email address** text box, type the email address where you want to receive the catch-all messages:
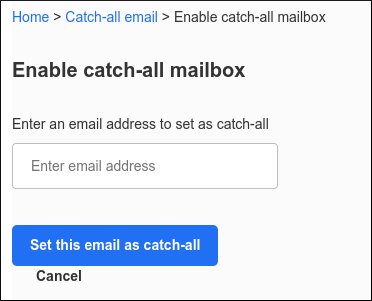
4. Click **Set this email as catch-all**. The catch-all address is now active.
## Importing email data from another server
You can import messages from another email account on a remote server. For detailed information about how to do this, please see [Importing email data into Titan Mail accounts](/emails/titan-mail/importing-email-data-into-titan-mail-accounts).
## Checking the DNS status of your domain
This section enables you to set up your domain for email, and check the current status of your domain's MX and TXT DNS records.
For detailed information about how to set up DNS records for your domain's email, please see [Setting up your domain's DNS records for Titan Mail](/emails/titan-mail/setting-up-your-domains-dns-records-for-titan-mail).
## Getting the mobile app for Android and iOS devices
To download the mobile app, click the **Get Mobile App** icon.
## Setting up DKIM (DomainKeys Identified Mail)
DKIM (DomainKeys Identified Mail) helps ensure that your messages are delivered reliably to recipients.
For detailed information about how to set up DKIM for your domain, please see [Setting up DKIM (DomainKeys Identified Mail) for Titan Mail accounts](/emails/titan-mail/setting-up-dkim-domainkeys-identified-mail-for-titan-mail-accounts).
## Getting configuration information for third-party email client applications
To view configuration information for third-party email client applications, such as IMAP and SMTP server settings, click the **Configure desktop app** icon.
For additional information about how to set up a third-party client application for your email accounts, please see [Setting up Titan Mail on an email client application](/emails/titan-mail/setting-up-titan-mail-on-an-email-client-application).
## Related articles
* [Changing your password for Titan Mail accounts](/emails/titan-mail/changing-your-password-for-titan-mail-accounts)
* [Importing contacts into Titan Mail accounts](/emails/titan-mail/importing-contacts-into-titan-mail-accounts)
* [Managing your email in Titan Mail webmail](/emails/titan-mail/managing-your-email-in-titan-mail-webmail)
* [Setting up DKIM (DomainKeys Identified Mail) for Titan Mail accounts](/emails/titan-mail/setting-up-dkim-domainkeys-identified-mail-for-titan-mail-accounts)
* [Integrating Titan Mail accounts with Gmail](/emails/titan-mail/integrating-titan-mail-accounts-with-gmail)
* [Managing email signatures for Titan Mail accounts](/emails/titan-mail/managing-email-signatures-for-titan-mail-accounts)