> ## Documentation Index
> Fetch the complete documentation index at: https://support.webcentral.au/llms.txt
> Use this file to discover all available pages before exploring further.
# Importing contacts into Titan Mail accounts
> Learn how to import your contacts from Gmail or a CSV file into Titan Mail accounts.
This article describes how to import your contacts into Titan Mail accounts. Importing and managing your contacts is an important step in configuring and personalizing your email accounts.
There are two ways you can import your contacts:
* Directly from Gmail.
* From a CSV (comma-separated values) file. Many third-party email applications, such as Microsoft Outlook, allow you to export your contacts in CSV format.
## Importing contacts from Gmail
To import your contacts from Gmail, follow these steps:
1. Log in to your webmail account at [https://webmail.webcentral.au/](https://webmail.webcentral.au/)
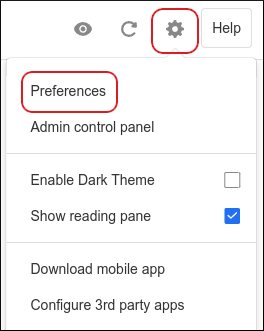
2. Click the **Settings** (gear) icon, and then click **Preferences**:
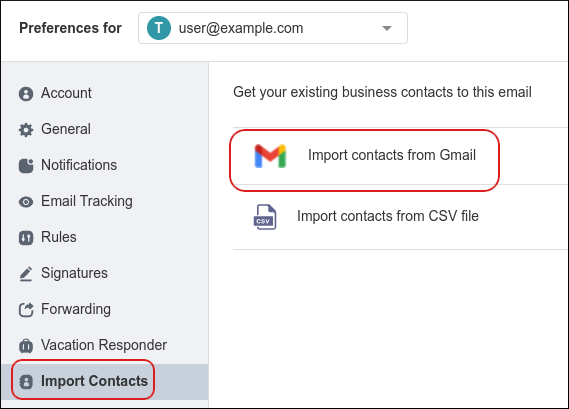
3. Click **Import Contacts**, and then click **Import contacts from Gmail**:
4. Under **Choose an account**, log in to the Google account you want to import contacts from.
5. A dialog box appears with **Titan wants access to your Google Account**. Select the **See and download your contacts** check box:

If you want to access **Other contacts** from the Google account, select the **See and download contact info automatically saved in your "Other contacts"** check box as well.
6. Click **Continue**. The import process begins.
7. To verify the contacts imported successfully, in the left sidebar, click the **Switch apps** icon, and then click **Contacts**

8. Click **All Contacts**

You should now see the contacts from the Google account.
## Importing contacts from a CSV file
If your contacts don't have a Gmail account, you must first export them to a CSV file. If you are unsure of how to do this on your current email client, check its documentation, or see Exporting contacts to a CSV file on Outlook below for a sample guide on how to export contacts on a third-party email application.
To import your contacts from a CSV file, follow these steps:
1. Log in to your Titan Mail account.
2. Click the **Settings** (gear) icon, and then click **Preferences**:

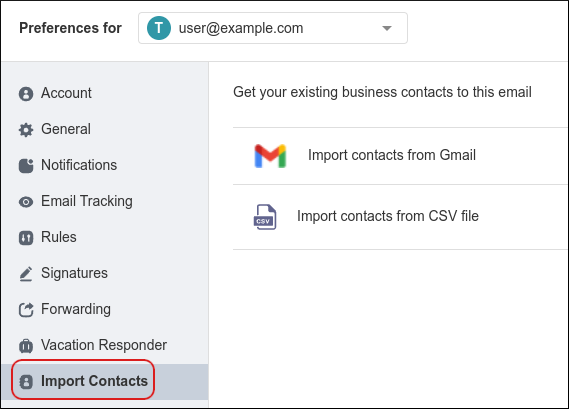
3. Click **Import Contacts**:
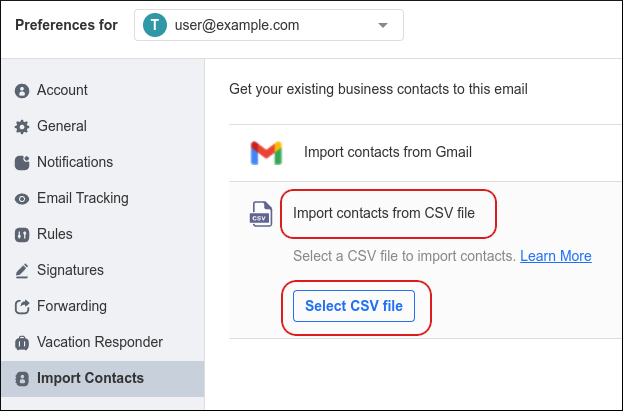
4. Click **Import contacts from CSV file**, and then click **Select CSV file**:
5. Select the CSV file on your computer that you want to use, and then click **Open**.
6. Click **Import Contacts**:
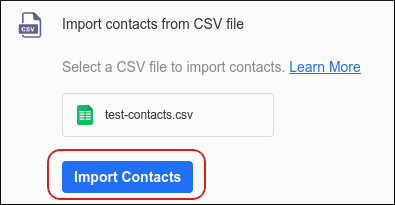
The import process begins.
If you have a lot of contacts in the CSV file, the process may take some time.
7. To verify the contacts imported successfully, in the left sidebar, click the **Switch apps** icon, and then click **Contacts**
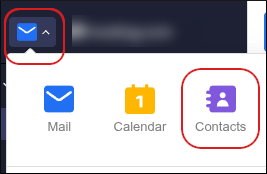
8. Click **All Contacts**
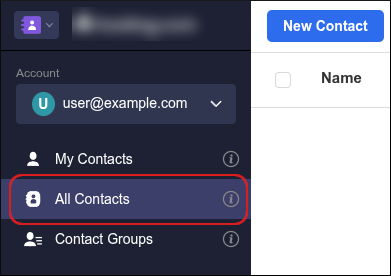
You should now see the contacts from the CSV file.
### Exporting contacts to a CSV file on Outlook
To export your contacts to a CSV file on Outlook, follow these steps:
1. On your computer, start Outlook.
2. Click **File**, and then click **Open & Export**.
3. Click **Import/Export**. The **Import and Export Wizard** dialog box appears.
4. Under **Choose an action to perform**, click **Export to a file**, and then click **Next**.
5. Under **Create a file of type**, click **Comma Separated Values**, and then click **Next**.
6. Under **Select folder to export from**, click **Contacts**, and then click **Next**.
7. Under **Save exported file as**, type a file name, and then click **Next**.
8. Click **Finish**.
9. Open the CSV file in Excel and verify that Outlook exported your contacts correctly. Make any necessary changes and save them, or just close the file without saving any changes. You can now use the CSV file to import your contacts into your Titan Mail account.
## More information
For more information about how to import contacts into Titan Mail accounts, please visit [https://support.titan.email/hc/en-us/articles/900000222403-Import-Contacts-to-Titan](https://support.titan.email/hc/en-us/articles/900000222403-Import-Contacts-to-Titan).