> ## Documentation Index
> Fetch the complete documentation index at: https://support.webcentral.au/llms.txt
> Use this file to discover all available pages before exploring further.
# Managing your profile in the Hosting Panel
> Learn how to manage the profile for your Webcentral account in the Hosting Panel.
This article describes how to manage your profile and account details for your Webcentral account. This article covers how to manage notifications, security, email history, account delegates, and more.
## Managing your personal information
To manage your personal information, follow these steps:
1. Log in to the Hosting Panel at [https://theconsole.webcentral.au](https://theconsole.webcentral.au).
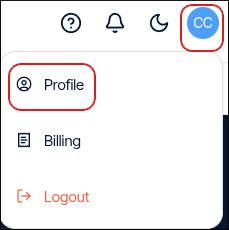
2. Click your initials in the top-right corner, and then click **Profile**:
3. The **Personal** section appears. In this section, you can add and modify the following items:
* Name and preferred language: Update the fields, and then click **Save**.
* Email addresses: Click **Add new**, complete the fields, and then click **Add email**.
* Phone numbers: Click **Add new**, complete the fields, and then click **Add phone**.
* Addresses: Click **Add new**, complete the fields, and then click **Add personal address**.
* Companies: Click **Add new**, complete the fields, and then click **Add business address**.
* You must add a phone number and address before you can add a company.
* You can add a VAT number and registration number for your company.
## Managing account notes
To manage account notes for your account, follow these steps:
1. Log in to the Hosting Panel at [https://theconsole.webcentral.au](https://theconsole.webcentral.au).
2. Click your initials in the top-right corner, and then click **Profile**:

3. In the left sidebar, click **Notes**.
4. To add a new note, click **Add new**, type the note, and then click **Add note**.
## Managing account security
To manage security settings for your account, follow these steps:
1. Log in to the Hosting Panel at [https://theconsole.webcentral.au](https://theconsole.webcentral.au).
2. Click your initials in the top-right corner, and then click **Profile**:

3. In the left sidebar, click **Security**.
4. In the **Login** section, you can change your Hosting Panel username.
5. In the **Change password** section, you can change your Hosting Panel password.
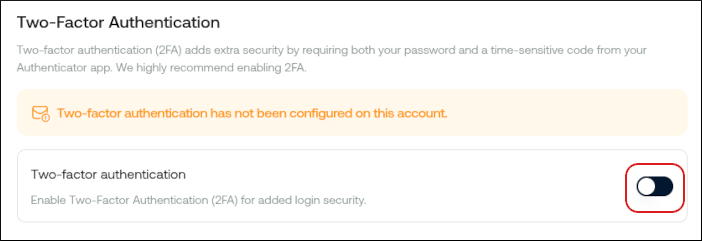
6. In the **Two-factor authentication** section, you can enable two-factor authentication (also known as "2FA"). To do this, click the slider:
* Scan the QR code with an authenticator app on your mobile device:
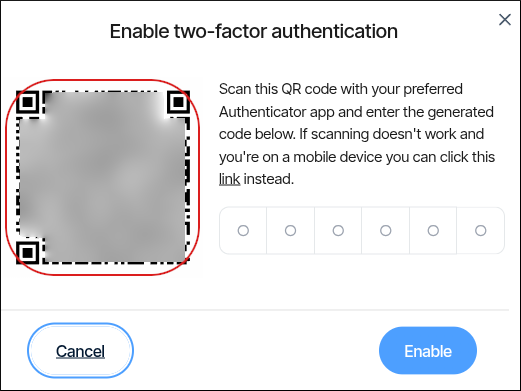
* In the **Enable two-factor authentication** dialog box, type the six-digit code that appears on your device's authenticator app.
* Two-factor authentication is now enabled. In addition to your username and password, you must provide a six-digit code generated by your device's authenticator app to log in to the Hosting Panel.
7. In the **Account Secrets** section, you can view your account secrets. Click **Add new** to add a secret.
8. To view your support PIN, in the right sidebar click **Support PIN**, and then click **Show PIN**. Support may ask you to provide this PIN to verify your identity when you contact them.
You can generate a new support PIN at any time. To do this, click **Support PIN**, and then click **Generate new PIN**.
## Managing notifications
To manage notifications for your account, follow these steps:
1. Log in to the Hosting Panel at [https://theconsole.webcentral.au](https://theconsole.webcentral.au).
2. Click your initials in the top-right corner, and then click **Profile**:

3. In the left sidebar, click **Notifications**. You can change notification preferences for:
* Billing
* Marketing
* Support
* Service Updates
You cannot disable System notifications. These are essential for the security and operation of your account.
4. To change notification preferences, select or clear the **Email** or **In-App** options, and then click **Save**.
## Managing email history
To view and manage your email history, follow these steps:
1. Log in to the Hosting Panel at [https://theconsole.webcentral.au](https://theconsole.webcentral.au).
2. Click your initials in the top-right corner, and then click **Profile**:

3. In the left sidebar, click **Email History**. In this section, you can:
* Click the **>** icon to view a message in detail.
* Click **Filter**, and then filter the messages that appear in the list by selecting from a list of criteria.
* Click **Sort**, and then sort messages by date or subject.
## Managing delegates
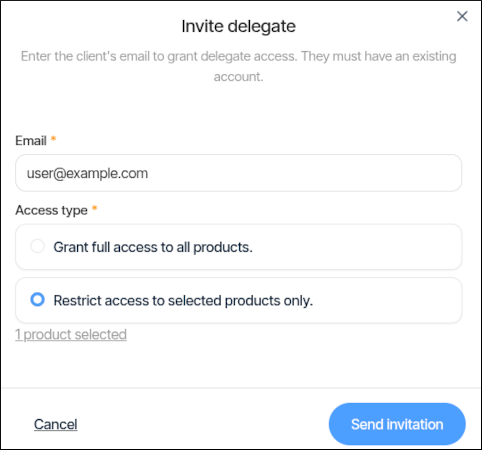
You can designate delegates to act on your behalf in managing your account. You can grant delegates access to all of your products and services, or only a select number.
Delegates must have an existing account on the Hosting Panel to accept invitations.
To view and manage delegates for your account, follow these steps:
1. Log in to the Hosting Panel at [https://theconsole.webcentral.au](https://theconsole.webcentral.au).
2. Click your initials in the top-right corner, and then click **Profile**:

3. In the left sidebar, click **Delegates**. In this section, you can:
* Click the **>** icon to view a delegate in detail.
* Click **Filter**, and then filter the delegates that appear in the list by selecting from a list of criteria.
* Click **Sort**, and then sort delegates by their access type or date invited.
4. To add a delegate, click **Invite delegate**. In the **Invite delegate** dialog box, type the email address of the person you want to invite, select what type of access you want to grant, and then click **Send invitation**:
After the invitee accepts the invitation, they can then access the product or service you specified in step 5.
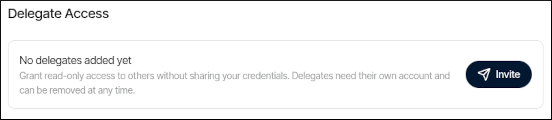
Alternatively, if you want to quickly add a new delegate to one of your products or services, go to the product or service, click the **Settings** tab, and in the **Delegate Access** section, click **Invite**: